更新日:、 作成日:
Windows 10 デスクトップの解像度を変更する
はじめに
Windows10 でデスクトップや画面の解像度を変更する方法を紹介します。
設定 > システム > ディスプレイ から、解像度と DPI を変更できます。
設定 > 簡単操作 > ディスプレイ から、文字の大きさを変更できます。
ディスプレイの推奨解像度に合わせると鮮明に表示できます。逆に合っていないとぼやけたりにじみます。
拡大率 (DPI) を変更して全体的に大きくしたり、文字の大きさを変更できます。
おすすめの変更方法は次の通りです。
- 画面の解像度をディスプレイに合わせる
- 全てが小さいと感じるときは拡大率 (DPI) を変更する
- 文字だけ小さいと感じるときは文字の大きさを変更する
ディスプレイの解像度を変更する
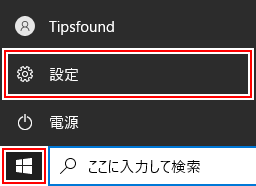
[スタートボタン] をクリックして [設定] をクリックします。
[システム] をクリックします。

[ディスプレイ] をクリックします。
マルチディスプレイの環境なら解像度を変更する [画面の番号] をクリックします。
[解像度] を選択します。モニターの解像度に合わせると鮮明に表示されます。
モニターの解像度には (推奨) の文字が表示されることがあります。[ディスプレイの詳細設定] をクリックして、その解像度を確認できます。
変更後の解像度が表示されるので、問題なければ [変更の維持] をクリックします。
解像度が変更されます。
スポンサーリンク
拡大率 (DPI) を変更する
解像度を変更して全体的に小さいと感じるときは、拡大できます。
[スタートボタン] をクリックして [設定] をクリックします。
[システム] をクリックします。
[ディスプレイ] をクリックします。
マルチディスプレイの環境なら拡大率を変更する [画面の番号] をクリックします。
[テキスト、アプリ、その他の項目のサイズを変更する] から拡大率を選択します。リストに無い拡大率を指定したいときは [表示スケールの詳細設定] をクリックします。
好きな [拡大率] を入力して [適用] をクリックします。
左の画像が 100%。右の画像が 125% です。
解像度はそのままにすべての大きさを拡大できます。
文字の大きさを変更する
文字が小さいと感じるときは、拡大できます。
[スタートボタン] をクリックして [設定] をクリックします。
[簡単操作] をクリックします。
[ディスプレイ] をクリックします。
[スライダー] をドラッグして文字の大きさを変更したら [適用] をクリックします。
150% にするとこのようになります。
すべての文字が大きくなりますが、リボンやタスクバーなど拡大されない文字もあります。
スポンサーリンク